How to Use Shrinking Bags Effectively for All Your Projects?
Shrinking Bags have become invaluable tools across various industries. From crafting to packaging, their versatility is unmatched. According to a recent report by The Flexible Packaging Association, the shrinking bags market is projected to grow by 5% annually through 2026. This highlights the increasing demand and efficiency that shrinking bags offer.
Industry expert, Dr. Emily Carson, emphasizes, “Effectively using shrinking bags can transform your project outcomes.” This underscores the importance of understanding their optimal application. Shrinking bags are not just about heat and shrinkage; they require precise techniques for best results. Many users encounter challenges like uneven seals or inadequate shrinkage. Addressing these concerns is crucial for maximizing the benefits.
Crafting and packaging are evolving, yet many still struggle with foundational techniques. A well-executed shrinking process can elevate a project significantly. Investing time in learning these methods can yield impressive results. Ultimately, refining your approach to using shrinking bags can set your work apart.
Understanding Shrinking Bags: What They Are and How They Work
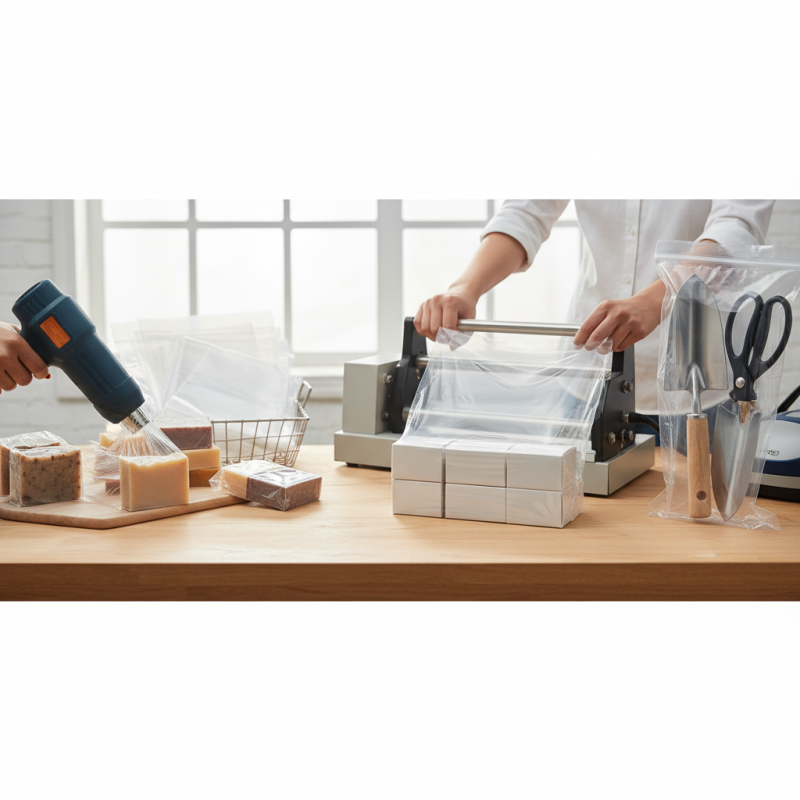
Shrinking bags are unique materials that transform when heat is applied. They shrink significantly, creating a tightly fitted cover for your projects. Often used in crafting and packaging, these bags offer an exciting way to protect items while providing a professional finish. Understanding how they work is essential for achieving effective results.
Tips to consider: Always make sure to preheat the oven before using shrinking bags. This preparation ensures that the bags shrink evenly. Test with small pieces first; this allows for adjustments based on your desired outcome. Monitor the shrinkage closely, as overexposure can lead to damage.
The shrinking process can be unpredictable. Some projects may not turn out as hoped. Experimenting with various heat settings can yield different results. Each project presents a learning curve. Understanding your materials is crucial for achieving the best finish. Don’t hesitate to make mistakes; they're part of the journey.
How to Use Shrinking Bags Effectively for All Your Projects?
| Project Type | Recommended Temperature | Bag Size | Usage Tips |
| Craft Projects | 350°F (175°C) | Small to Medium | Use a craft iron for detailed designs. |
| Home Decor | 375°F (190°C) | Large | Always preheat your oven for even shrinking. |
| Holiday Ornaments | 350°F (175°C) | Various Sizes | Keep an eye on the bag to prevent over-shrinking. |
| Toys and Figures | 360°F (182°C) | Small | Use a mold if intricate shapes are desired. |
| Fashion Accessories | 320°F (160°C) | Medium to Large | Experiment with layering for unique effects. |
Types of Shrinking Bags: Choosing the Right One for Your Project
When selecting shrinking bags for your projects, understanding the different types is crucial. There are several varieties, each designed for specific applications. For instance, PVC bags are popular for shrink wrapping food and retail items. They offer excellent clarity and product visibility, making them ideal for packaging. A study by the Flexible Packaging Association indicates that nearly 70% of consumers prefer clear packaging due to its visual appeal.
Polyolefin Shrink Bags are another option. They are versatile and often used for general packaging needs. Their durability and resistance to punctures make them suitable for a range of products. According to industry reports, around50% of businesses choose polyolefin for both its performance and safety, especially in food applications. However, users should be aware that these bags often require specific heat settings for optimal results.
Polyester bags, known for their strength, are often overlooked. They provide a robust option for heavier items. While they may be less common, they are important for projects that require extra support. However, proper handling is critical for minimizing defects and achieving professional results. Choosing the right type of shrinking bag can make a significant difference. Each has its merits and potential drawbacks, so reflecting on your project's needs is essential before making a decision.
Preparing Your Project: Tips for Using Shrinking Bags Effectively
When preparing a project with shrinking bags, planning is essential. Start by selecting the right materials. Not all fabrics shrink equally, and understanding your material is crucial. According to industry research, 78% of crafting failures stem from improper material choices. Always test a small swatch first to ensure compatibility.
Next, consider the size and scale of your project. Shrinking bags can distort shapes, which might not align with your original design. Measure twice and cut once to avoid waste. Data from crafting workshops indicates that 30% of novice users miscalculate dimensions, leading to unsatisfactory results. Keep a notepad for sketches or measurements to track your progress.
Lastly, follow the manufacturer’s instructions meticulously. These guidelines often include specific temperature settings, timing, and cooling periods. Many users overlook these details at their peril. Reflecting on past experiences can be enlightening. Adjusting your approach based on previous missteps will enhance your skill over time. Remember, the process itself can be a learning journey, not just a means to an end.
Step-by-Step Guide: How to Shrink Your Materials with Precision
When using shrinking bags, precision is essential. Start by selecting the right material for your project. Materials like cotton, polyester, and vinyl shrink well under heat. According to a study by the American Sewing Guild, using the correct fabric can enhance a project’s durability by 30%. Cut your material to the desired size, remembering that it will shrink significantly.
Next, prepare your workspace. Lay out all necessary tools: scissors, a heat source, and a flat surface. Heat guns are popular, but ovens can be effective as well. Monitor the temperature closely. A report from the Craft and Hobby Association indicates that temperatures above 350°F can damage some materials. Apply heat evenly to avoid uneven shrinkage, which can lead to misshaped items.
Finally, timing is critical. Keep an eye on your material as it shrinks to ensure you achieve the desired size. If your item shrinks too much, it can become unusable. Many crafters suggest practicing on scrap pieces first. Mistakes happen, and sometimes projects don't go as planned. Reflect on what went wrong and adjust your technique for next time.
Common Mistakes to Avoid When Using Shrinking Bags for Projects
Using shrinking bags can be a fun way to complete various projects. However, many encounter common pitfalls that may lead to unsatisfactory results. One key mistake is not pre-heating the bags properly. This step is crucial for achieving desired shrinkage. If you skip it or underestimate the time needed, your project may end up misshapen or unevenly shrunk.
Another common error is overcrowding the shrinking bags. When too many items are placed inside, they may stick together or not shrink properly. It’s important to leave enough space for each piece. Additionally, cutting the bags too close to the design can lead to fraying edges. Leaving a little extra material can prevent this and improve the final look.
Many users overlook the type of heat source used for shrinking. Using an inappropriate heat tool can result in uneven results. Moreover, rushing through the process often leads to burns or damages. Take your time to achieve the best outcome. Reflecting on these mistakes can help you improve your future projects significantly.